Tuesday, January 11, 2011

Scrap n Easel

Check out the new Scrap n' Easel -


I am excited for this product. I can see myself using it...I have added it to my birthday wish list for next month!!!!

It is available for preorder right now and get 10% off if you use the code: IHEARTSCRAP'NTOTE

Check it our here:
Scrap n' Easel

Saturday, January 1, 2011

January Vinyl Challenge

Do you love playing with vinyl? Been wanting to try it out? Well....there is no better time than now!

Welcome to our first Vinyl challenge. We will be running this monthly vinyl challenge all year! The challenge will be posted on the first of each month and you will have until Midnight on the last day of the month to post your project. I will select a winner using random.org and post the winner along with the new challenge on the 1st day of the new month.

CraftVinyl.com has graciously offered to be our sponsor for the entire year! How cool is that? Craft Vinyl offers high quality vinyl in many great colors and they also have some really fun vinyl like Chalkboard and glow in the dark. And....at a price that can't be beat! CraftVinyl guarantees that you won't find it at a better price anywhere. In fact; here is their promise (taken directly from the Craft Vinyl website):

"I am the ONLY merchant online who will promise this: If you find a lower price on ANY other website on the planet offering a lower price for cricut vinyl sheets I will beat it! or, If I cant beat it, I will send you 10 sheets of cricut vinyl absolutely free, no questions asked! I will even pay the shipping!"

CraftVinyl.com will be giving the winner of each monthly challenge 10 sheets of 12x12 glossy vinyl; you choose the colors.

So...lets get started!!!!!

January Challenge

Have you made your New Years Resolution(s) yet? Let's help ourselves stay on task with this challenge. Create a vinyl project that will help remind you of your New Years Resolution(s). Whether it be a quote on the wall; an inspirational message on your bathroom mirror; or a Vacation fund jar.

One of my resolutions is to be more crafty...keep up with this blog and other crafty commitments. I created some fun vinyl wall art for above my crafting table.

I cut the swirl on pink vinyl from the Picturesque cartridge.
The word Create was on the Wall Decor and More cartridge.


Create your project and post a link to it here on this post by midnight on January 31st.
 (Projects must be newly created for this challenge)


Tuesday, December 28, 2010

A fun and Exciting Announcement

I am very excited to announce that I will be starting a monthly challenge on my blog and I have an awesome sponsor too!

Come join me in some vinyl fun!

Each month I will post a challenge using vinyl. You will have one month to create a fabulous project and link it to the post. At the end of the month I will randomly choose 1 winner to receive 10 pieces of 12x12 glossy vinyl from CraftVinyl.com

Come back on January 1st for our first challenge!

Christmas Vacation crafting with the kids - Day 2

Today the kids enjoyed the project we made. We created glow in the dark pillow cases. I had some glow in the dark t-shirt vinyl from Craftvinyl.com and it was so fun to do. The kids picked an image that they each wanted and I selected a font for their names. We cut it in the Cricut and they were so excited when they took it in a dark room to see it.

I didn't take pictures of the process; but I will next time. It is super easy!


I can't take a picture of it :( The glo in the dark is so cool but the pictures do not capture it very well.

Here are photos of my youngest daughters pillow case:


Crop out Diabetes - Hop for a cure blog hop

We are looking for 5 or more blogs to join us for the 2011 Hop for a Cure. If you would like to join us contact me today for more information.

Visit our blog at: www.cropoutdiabetes.blogspot.com

Monday, December 27, 2010

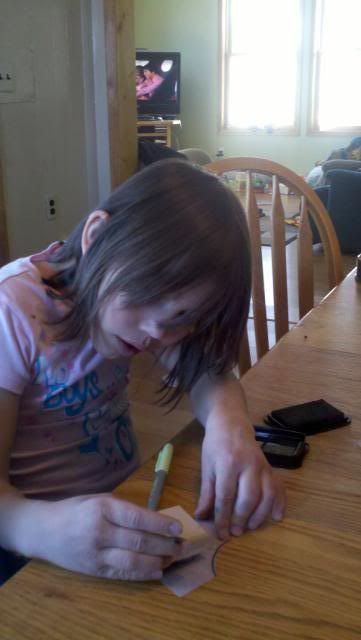
Christmas vacation crafts Day 1- Shrinky Dinks

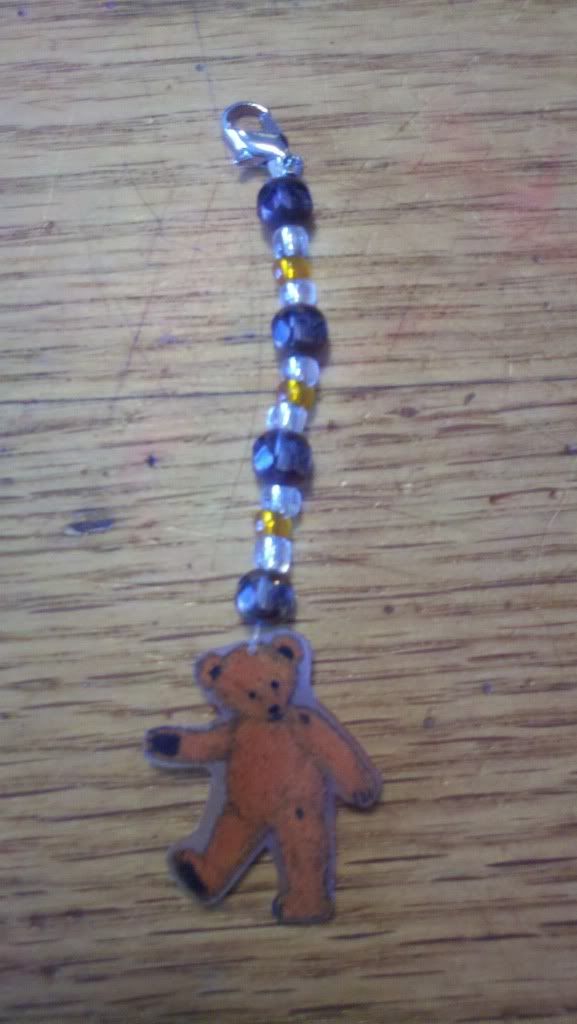
I wanted to do some crafty things with the kids over Christmas vacation and the first days project was a hit.  We made key chains.  Mine is for my work key and the kids are putting theirs on their backpacks.


Materials needed:
Shrinky Dink plastic
Stamps or Cricut machine with Mini Sharpie holder
Colored Pencils or Sharpies
Crop-a-dile (or hole punch)
Heat tool
tweezers
string (we used fishing line)
beads
key chain rings or similar

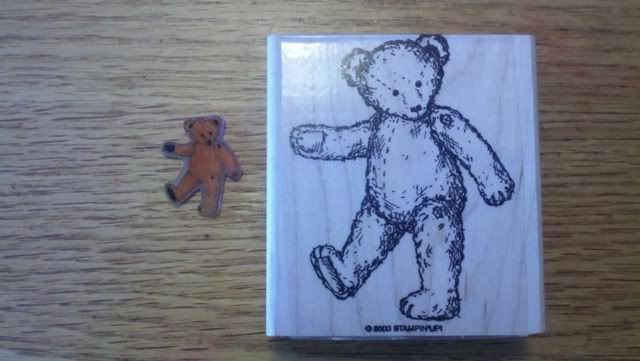
1. Stamp your image or use your Cricut and Sharpie Marker holder (http://amychomas.blogspot.com/) to draw your image. 
2. Cut out your image using your Cricut, scissors, or punch.
3.Color in your image with Sharpies or colored pencils.
4. Punch a hole in the top of your image.
5. Use your heat tool to shrink the image.  Use a tweezers to hold the shrinky dink plastic down so you don't burn your fingers.
6. String the fishing line through the hole in your image.  Place the image like a necklace pendant; in the middle of the line.  Bring together the two ends of the line and start beading.
7. When you are done beading; tie the line to the ring/clasp of your choice.


I am excited for tomorrows project!  The kids are going to love it!

Thursday, December 23, 2010

Using Design Studio to create a blog header tutorial

Are you ready?  I discovered how easy it is to do this and I know you are going to love it too!

First you need to have Design Studio installed on your computer.  If you do not have the Design Studio; you can download the FREE TRIAL here: http://www.cricut.com/CDS/DesignStudioTrial1.aspx
You will also need to have a screen capture software on your computer.  I use Screen Hunter.  You can download it for free here: http://wisdom-soft.com/products/screenhunter_free.htm

Now...to the fun part.  Open up the Design Studio and start designing.

The First thing you want to do is create a rectangle (for blog header) or square base (for a blog button).  For a header you are going to want to be working on a 12x24 mat.  To change the mat size go to the top of the screen and click on VIEW ~ MAT SIZE ~ 24X12

To create an image that is going to fill the header space on your blog you will want to make the rectangle as large as you can fit in the screen.  It has to all be visible without scrolling in order to create a screenshot of the image.
Now place your mouse pointer on the cutting mat and right click.  A window will open and you will find the option to set preview color.  This is going the be the background of your image so choose a color accordingly.  You can also add a title to this page to help you keep track of where everything is.
Now you need to open a new page (click on the top image on the left side of the screen with what looks like a piece of paper and a star on it).  Add another image to this page. And title your page and choose the color of the image.  You will need to change the page order as you go to ensure the correct images show in the correct order.  To do this right click on your cutting mat and select page order.  Then select where you need this page to be.
Continue creating pages (a different page for each color that you are using.  Do not overlap images.  If they need to overlap; you need to create a new page/layer.)

Now...click on the preview button (the little eye on the left) and you will see the image.  Click on the differnt page layers to get a little different image until you find the one you like.  Now adjust as you see fit.


When you are happy with your image you will need to capture it.  Open up your Screen Hunter (or screen capture software).  Go to the Cricut Design Studio page and click on the eye to preview your image.  Use the F6 button on your keyboard to open up the Screen Hunter cursor.  Use your mouse to put the cursor (red box) to the top left corner of the image you want to capture. (Stay to the inside of your background color so that you don't catch any of the cutting mat in your image).  Click and hold the left mouse button down and drag the capture window to the right to include your entire image.  When you release the left mouse button it will click and it will have captured the image (mine goes right to my desktop).  If you like the image go put it on your blog.

-------------------
To add to your blog in blogger:
1. Open your blog and click on the Design tab at the top of the screen.
2. Click on edit in your header (the first dotted box)
3. Find the image on your computer and add it.
4. Hit save and enjoy your header!!!!

If you create one come back here and post a link to your blog....I would love to see what you create!!!!

I JUST THREW THIS TUTORIAL TOGETHER QUICK...SO IF YOU HAVE ANY QUESTIONS PLEASE FEEL FREE TO ASK AND I WILL UPDATE THE TUTORIAL IF NEEDED!!!!!!

Finkydink Creations

My creations are protected!

MyFreeCopyright.com Registered & Protected

Comment Counter - helps for give-a-ways :)

>

Networked blogs